How to manage tickets in Client Portal
1. Click My Area to access your tickets. To create a new ticket, click Add Ticket.
3. From the dropdowns, select a reason for reaching out and the solution you need help with. Once you've specified your issue, type in a Subject for your ticket. As you're typing your subject, you’ll see helpful links to Knowledge Base articles that may help resolve your issue in the Related articles section.
4. Lastly, type your question in the Description box. To attach a file with your ticket, click Attach a file. Once completed, click Submit.
5. To review your open and closed tickets, click My Area. To filter tickets by status, click Open, Closed, or On Hold. Use the Search Tickets bar to search for a particular ticket.
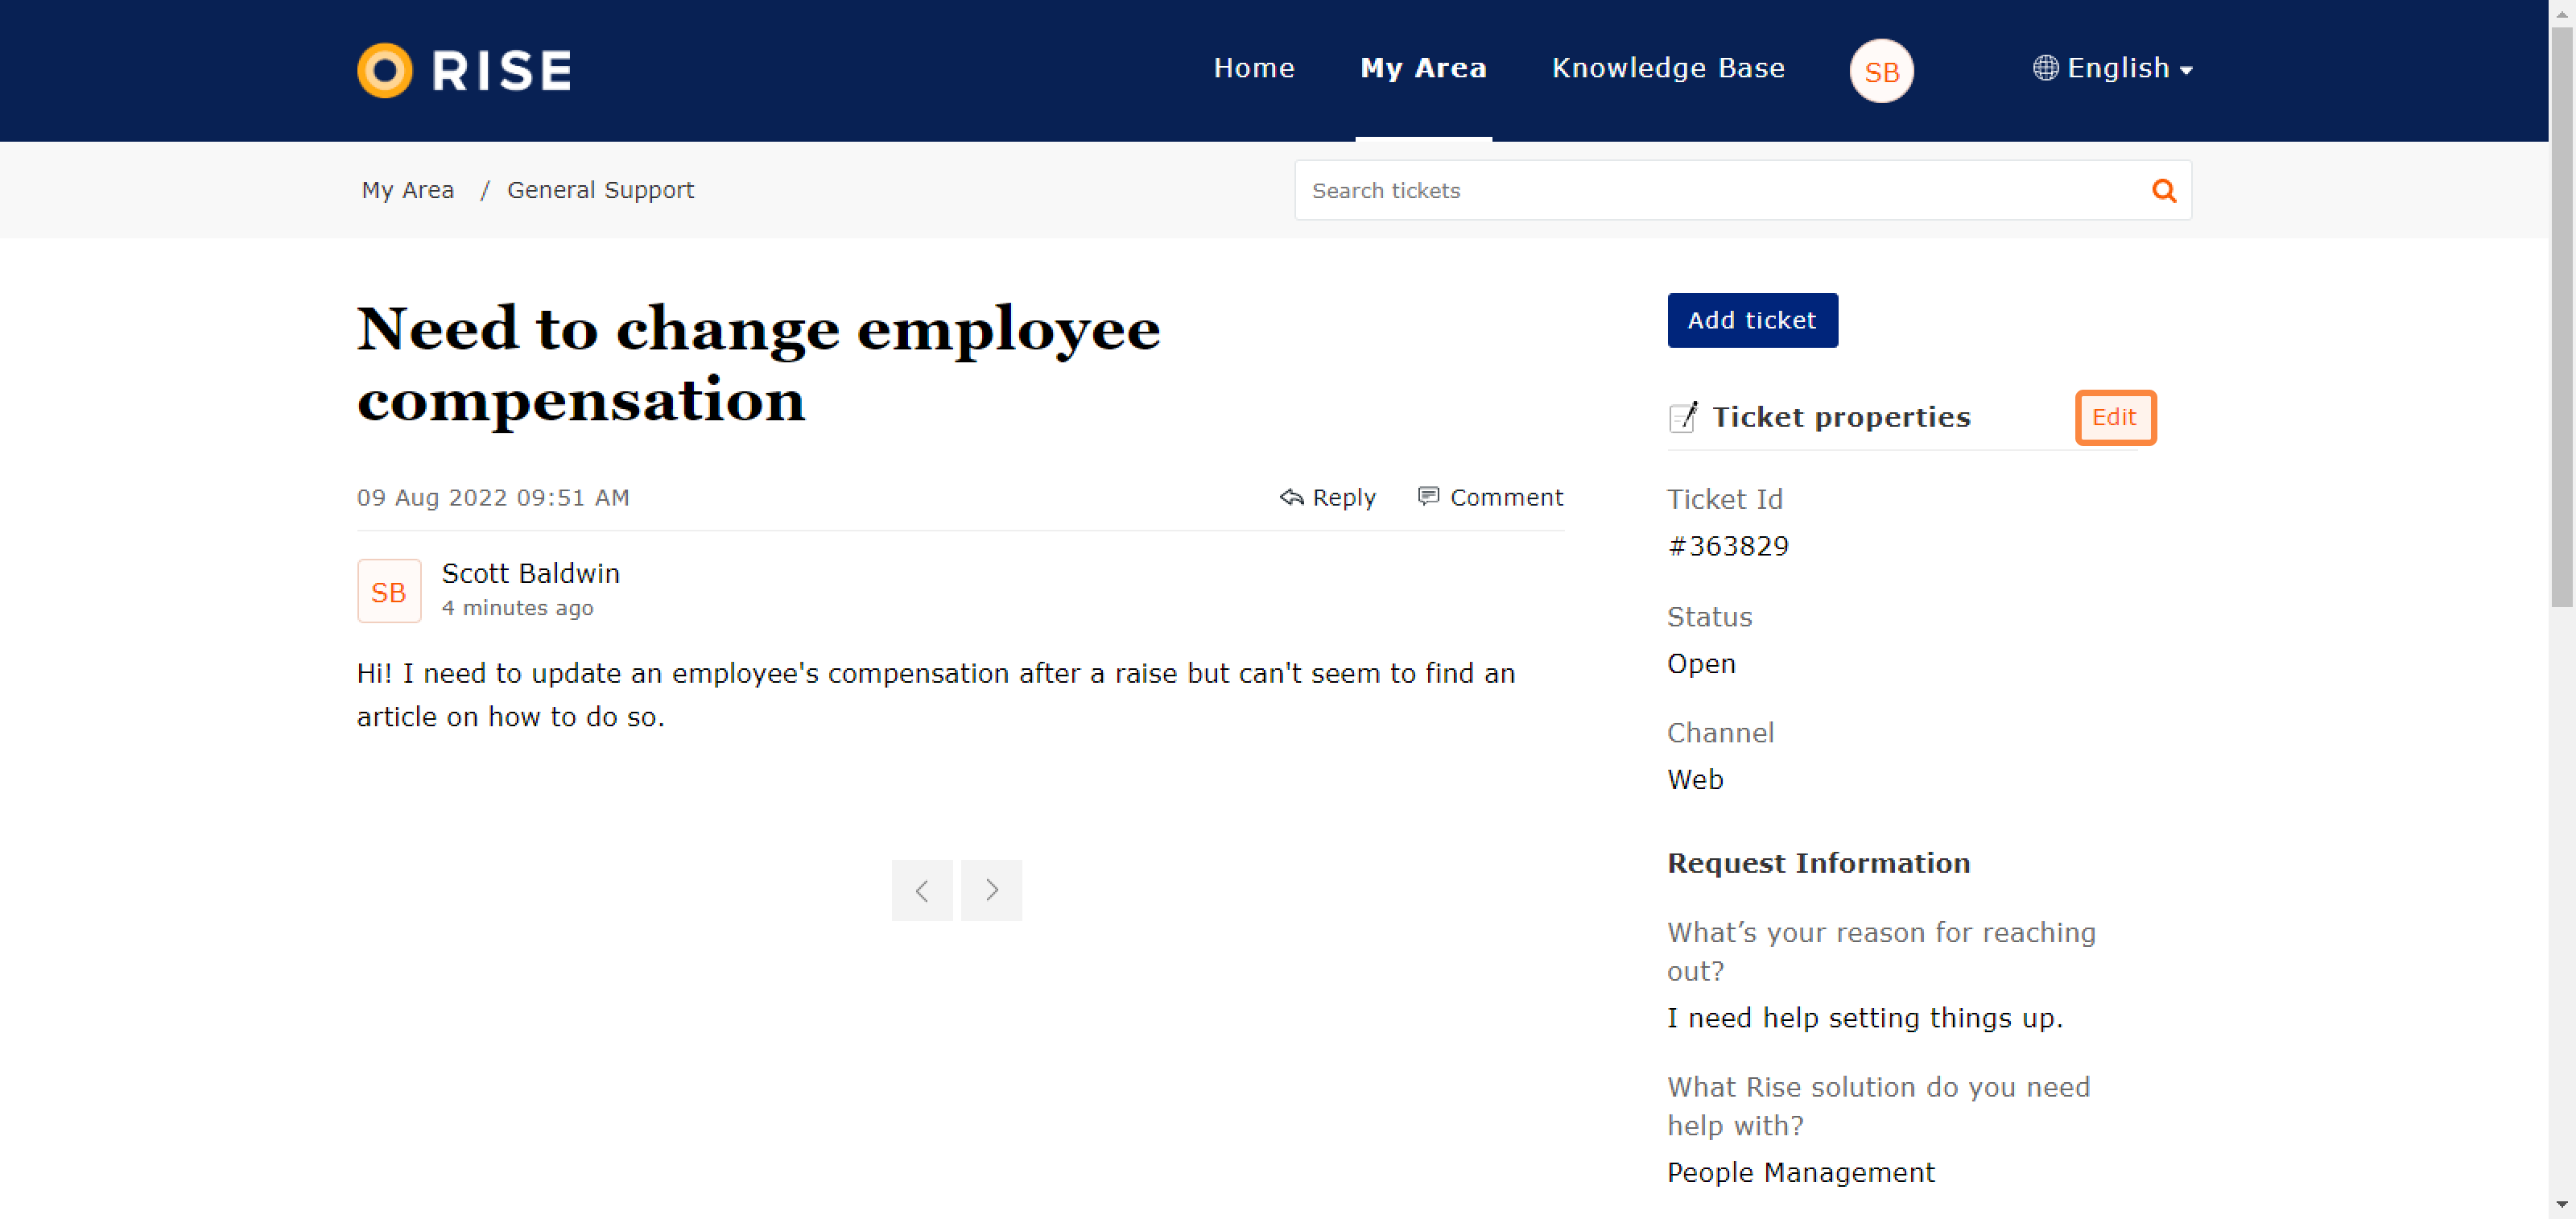
6. To open a ticket, click the ticket name.
7. On the right-hand side, you’ll see ticket properties such as Ticket ID, Response Date, Channel, Status, and Assigned To. Click Edit to re-open or make any changes to the ticket.