How to create a schedule in Rise Scheduling & Time Tracking
1. To create a new schedule, click + New Schedule.
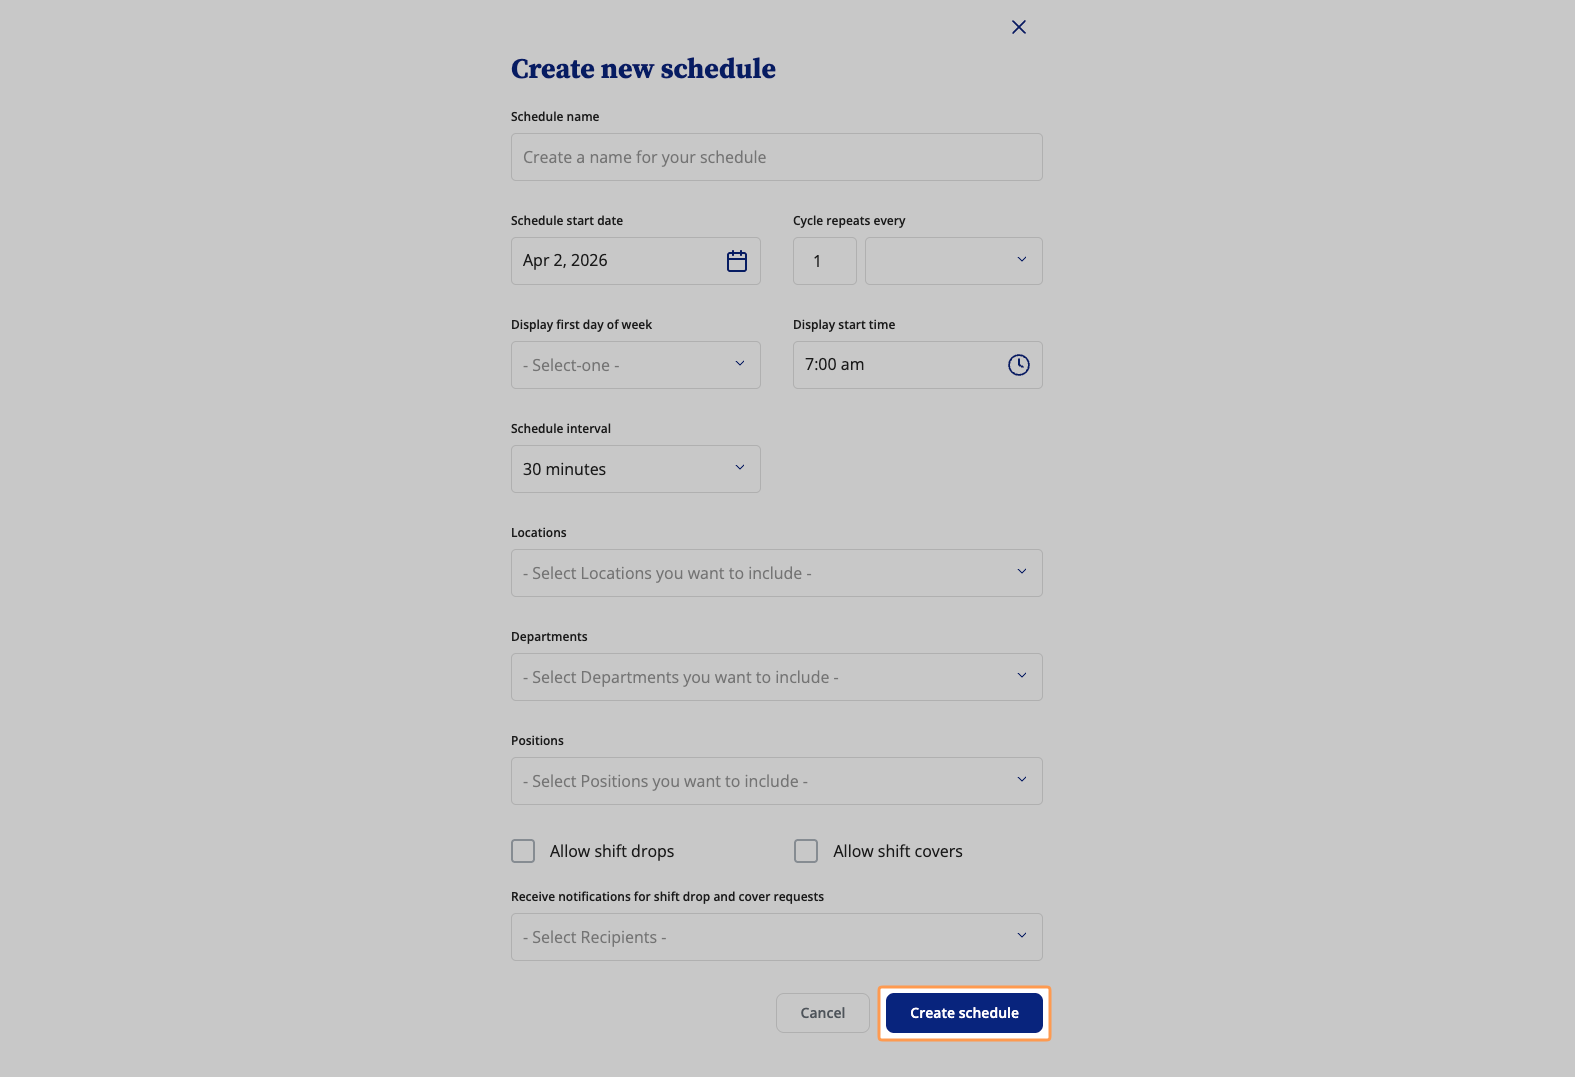
2. Next, you’ll see a pop-up window to create a new schedule with the following fields:
Schedule name - name of the schedule
Schedule start date - start date of the schedule
Cycle repeats every - choose the cycle frequency for the schedule. This configuration influences how often a schedule needs to be published.
Display first day of week - sets the default start day for shift(s) in the schedule
Display start time - sets the default start time for shift(s) in the schedule
Schedule interval - sets the length of the interval between shift assignments. The minimum schedule interval is 5 minutes
Departments - choose the department(s) to narrow down employees for the schedule
Locations - choose the location(s) to narrow down employees for the schedule
Positions - choose the position(s) to narrow down employees for the schedule
Shift cover and shift drop requests - choose whether or not to allow either/or for the schedule
To make it easier for you, the Schedule Start Date, Cycle frequency and Display Start Time fields are pre-populated. You can make changes to these fields, if needed.
Next, enter the required information such as Schedule Name, Display First Day of Week and Departments. The remaining fields are optional.
3. Rise Scheduling & Time Tracking allows employees to request Shift Cover or Shift Drop for their shifts. To allow shift drops and shift cover requests, select the required checkboxes. To learn more about shift cover and shift drop, read our How to manage your schedule in Rise Scheduling & Time Tracking article.
To assign owners and admins to receive notifications for shift drop and cover requests, click the dropdown and select their name.
Once completed, click Create schedule.
Related Articles
How to create shifts in Rise Scheduling & Time Tracking
1. To open a schedule, click its name in the navigation menu or click the Calendar icon above the schedule name. 2. You’ll see a detailed schedule with a list of employee(s) matching the eligibility criteria (locations, departments and positions) of ...How to manage timesheet settings in Rise Scheduling & Time Tracking
1. In Scheduling, click Time Tracking Settings on the navigation menu on the left-hand side. Timesheet Settings Timesheet Settings determine which pay classes use timesheets and what pay codes are available to employees within Timesheets. Owners or ...Navigate Rise Scheduling and Time Tracking
1. Navigate to Scheduling in Rise. 2. Here, you’ll see all your schedules. To sort your schedules by name or most recent, click the sorting arrow. 3. Use the navigation menu on the left-hand side to navigate through Rise Scheduling & Time Tracking. ...Linking Time Off policies to Scheduling & Time Tracking
Linking Time Off Policies is a part of Hours Classification settings in Scheduling & Time Tracking. To learn more about these settings, check out our About Hours Classification article. Note that all Time Off policies will automatically show up on ...How to create a departmental override in Rise Scheduling & Time Tracking
If you’d like a department to have different Scheduling & Time Tracking settings than your organization settings, you can create an override for that department. 1. In Settings, click Departmental Override on the navigation menu on the left-hand ...