How to manage locations
HR Managers, Admins and Owners can create multiple locations in Rise. The radius of a location marks the area within which an employee must be present to log their attendance. You can add or remove employees and assign shifts based on their location.
How to create a location
1. Navigate to People by clicking the icon in the left-hand navigation bar.
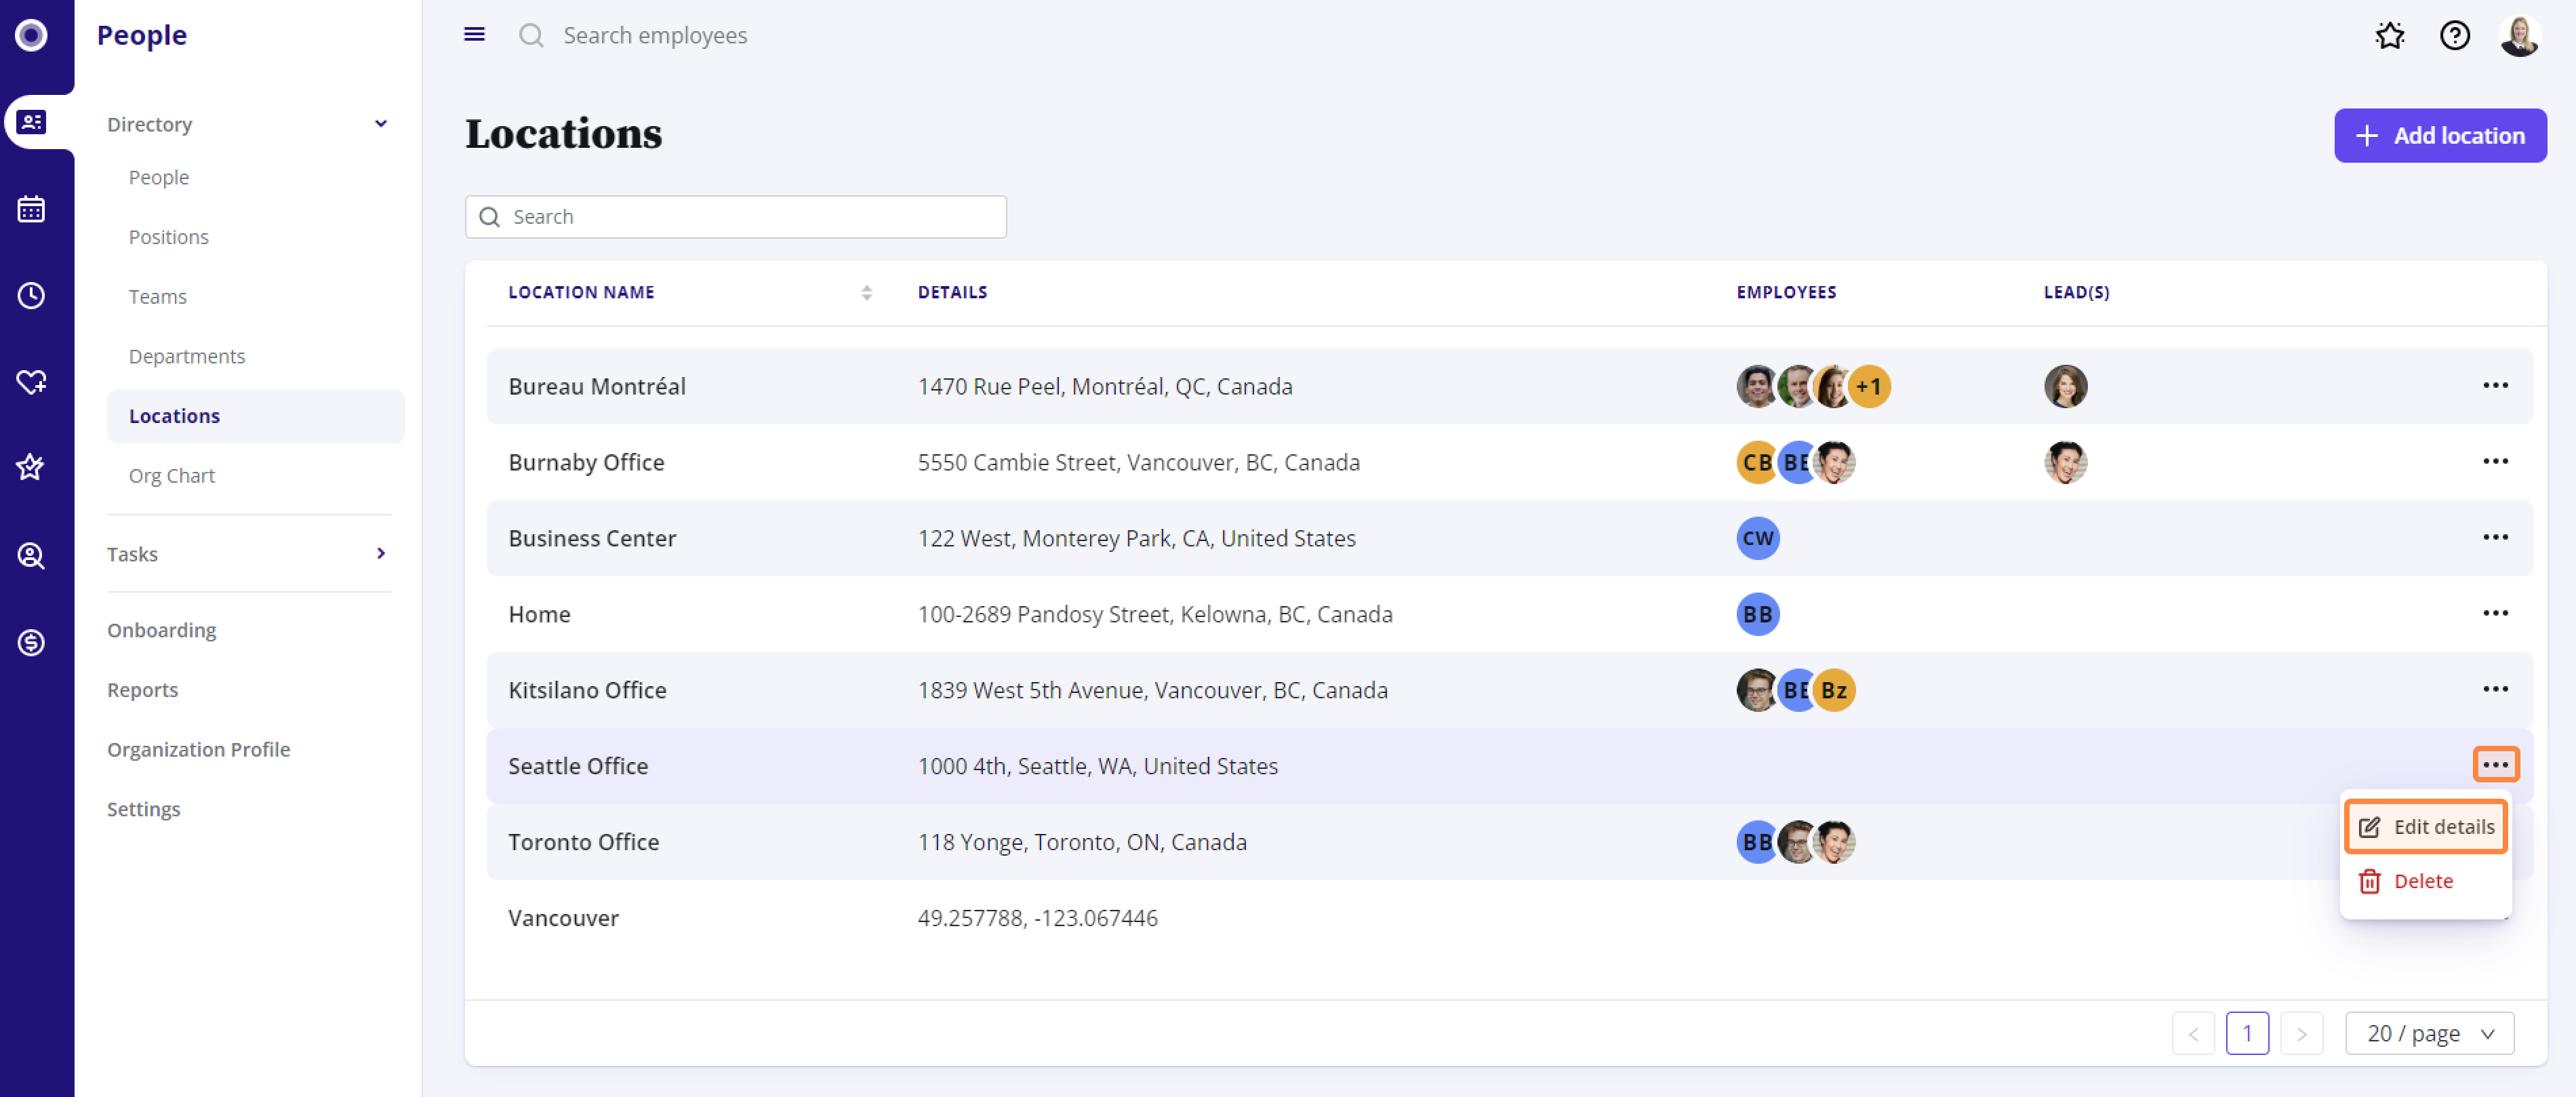
2. In the People menu on the left-hand side, under Directory, click Locations.
3. To add a new location, click + Add Location.
4. Give the location a name, then select whether you want to add the location using a street address or geographical coordinates. If you select Address, enter the address of the location and the Radius (between 100 to 1000 metres), then click Add Location. The radius determines how far an employee can be from the location while punching in and out successfully.

Location addresses aren't limited to Canada—you can add addresses anywhere in the world.
If you select GPS Coordinates, enter the Latitude and Longitude of the location, then add a Radius. Click Add Location when you're done.
5. Next, you’ll be taken to the location page from where you can add employees to your new location.
How to delete a location
1. To delete a location, click the ··· menu, then Delete.
2. Click Delete location to proceed. If you don’t want to delete the location, click Cancel. If you accidentally delete a location, click + Add location to add it back. However, in this case, you’ll have to re-enter the location details.
How to edit location details
1. To edit a location, click the ··· menu, then Edit details.
2. You can edit the location’s name, address, and radius. Once completed, click Save.
For more information on how to manage employees in a location, please check out our How to manage employees in a location article.